**Table of Contents** *generated with [DocToc](https://github.com/thlorenz/doctoc)*
## Vue3-Vite-Vant-TS-H5
基于Vue3 + Vite + Vant + Sass+ rem适配方案 + Axios封装,构建手机端模板脚手架
### 预览
[查看 demo](https://talktao.github.io/Vue3-Vite-Vant-TS-H5) 建议手机端查看
### 关注我的掘金
掘金:[Vue3 Vite Vant TS rem 移动端H5框架方案](https://juejin.cn/post/7078877401626705957)
### 贡献代码
使用过程中发现任何问题都可以提Issue 给我,也非常欢迎 PR 或 Pull Request
### Node 版本要求
`Vite` 需要 Node.js 12.0.0 或更高版本 (推荐 14.0.0+)。你可以使用 [nvm](https://link.juejin.cn?target=https%3A%2F%2Fgithub.com%2Fnvm-sh%2Fnvm "https://github.com/nvm-sh/nvm") 或 [nvm-windows](https://link.juejin.cn?target=https%3A%2F%2Fgithub.com%2Fcoreybutler%2Fnvm-windows "https://github.com/coreybutler/nvm-windows") 在同一台电脑中管理多个 Node 版本。
本示例 Node.js 14.18.1
### 启动项目
```
git clone https://github.com/talktao/Vue3-Vite-Vant-TS-H5.git
cd Vue3-Vite-Vant-TS-H5
yarn
npm run dev
复制代码
```
## 目录
- [rem适配方案](#rem%E9%80%82%E9%85%8D%E6%96%B9%E6%A1%88)
- [VantUI组件按需加载](#vantui%E7%BB%84%E4%BB%B6%E6%8C%89%E9%9C%80%E5%8A%A0%E8%BD%BD)
- [安装插件](#%E5%AE%89%E8%A3%85%E6%8F%92%E4%BB%B6)
- [Sass 全局样式](#sass-%E5%85%A8%E5%B1%80%E6%A0%B7%E5%BC%8F)
- [目录结构](#%E7%9B%AE%E5%BD%95%E7%BB%93%E6%9E%84)
- [父组件改变子组件样式 深度选择器](#%E7%88%B6%E7%BB%84%E4%BB%B6%E6%94%B9%E5%8F%98%E5%AD%90%E7%BB%84%E4%BB%B6%E6%A0%B7%E5%BC%8F-%E6%B7%B1%E5%BA%A6%E9%80%89%E6%8B%A9%E5%99%A8)
- [全局变量](#%E5%85%A8%E5%B1%80%E5%8F%98%E9%87%8F)
- [Vuex 状态管理](#vuex-%E7%8A%B6%E6%80%81%E7%AE%A1%E7%90%86)
- [Pinia 状态管理](#pinia-%E7%8A%B6%E6%80%81%E7%AE%A1%E7%90%86)
- [1.安装](#1%E5%AE%89%E8%A3%85)
- [2. 创建Pinia的Store](#2-%E5%88%9B%E5%BB%BApinia%E7%9A%84store)
- [3.在main.ts文件中引用](#3%E5%9C%A8maints%E6%96%87%E4%BB%B6%E4%B8%AD%E5%BC%95%E7%94%A8)
- [3. 定义State](#3-%E5%AE%9A%E4%B9%89state)
- [i. 传统的`options API`方式](#i-%E4%BC%A0%E7%BB%9F%E7%9A%84options-api%E6%96%B9%E5%BC%8F)
- [ii.Vue3 `setup`的编程模式](#iivue3-setup%E7%9A%84%E7%BC%96%E7%A8%8B%E6%A8%A1%E5%BC%8F)
- [4.获取/修改 state](#4%E8%8E%B7%E5%8F%96%E4%BF%AE%E6%94%B9-state)
- [Vue-router](#vue-router)
- [自动化导入路由](#%E8%87%AA%E5%8A%A8%E5%8C%96%E5%AF%BC%E5%85%A5%E8%B7%AF%E7%94%B1)
- [普通设置](#%E6%99%AE%E9%80%9A%E8%AE%BE%E7%BD%AE)
- [Axios 封装及接口管理](#axios-%E5%B0%81%E8%A3%85%E5%8F%8A%E6%8E%A5%E5%8F%A3%E7%AE%A1%E7%90%86)
- [接口管理](#%E6%8E%A5%E5%8F%A3%E7%AE%A1%E7%90%86)
- [如何调用](#%E5%A6%82%E4%BD%95%E8%B0%83%E7%94%A8)
- [vite.config.ts 基础配置](#viteconfigts-%E5%9F%BA%E7%A1%80%E9%85%8D%E7%BD%AE)
- [检查文件中的env路径](#%E6%A3%80%E6%9F%A5%E6%96%87%E4%BB%B6%E4%B8%AD%E7%9A%84env%E8%B7%AF%E5%BE%84)
- [配置 alias 别名](#%E9%85%8D%E7%BD%AE-alias-%E5%88%AB%E5%90%8D)
- [配置 proxy 跨域](#%E9%85%8D%E7%BD%AE-proxy-%E8%B7%A8%E5%9F%9F)
- [Eslint+Pettier 统一开发规范](#eslintpettier-%E7%BB%9F%E4%B8%80%E5%BC%80%E5%8F%91%E8%A7%84%E8%8C%83)
- [批量全局注册公共组件](#%E6%89%B9%E9%87%8F%E5%85%A8%E5%B1%80%E6%B3%A8%E5%86%8C%E5%85%AC%E5%85%B1%E7%BB%84%E4%BB%B6)
## rem适配方案
Vant 中的样式默认使用`px`作为单位,如果需要使用`rem`单位,推荐使用以下两个工具:
- [postcss-pxtorem](https://link.juejin.cn?target=https%3A%2F%2Fgithub.com%2Fcuth%2Fpostcss-pxtorem "https://github.com/cuth/postcss-pxtorem") 是一款 `postcss` 插件,用于将单位转化为 `rem`
- [lib-flexible](https://link.juejin.cn?target=https%3A%2F%2Fgithub.com%2Famfe%2Flib-flexible "https://github.com/amfe/lib-flexible") 用于设置 `rem` 基准值
更多详细信息: [vant](https://link.juejin.cn?target=https%3A%2F%2Fyouzan.github.io%2Fvant%2F%23%2Fzh-CN%2Fquickstart%23jin-jie-yong-fa "https://youzan.github.io/vant/#/zh-CN/quickstart#jin-jie-yong-fa")
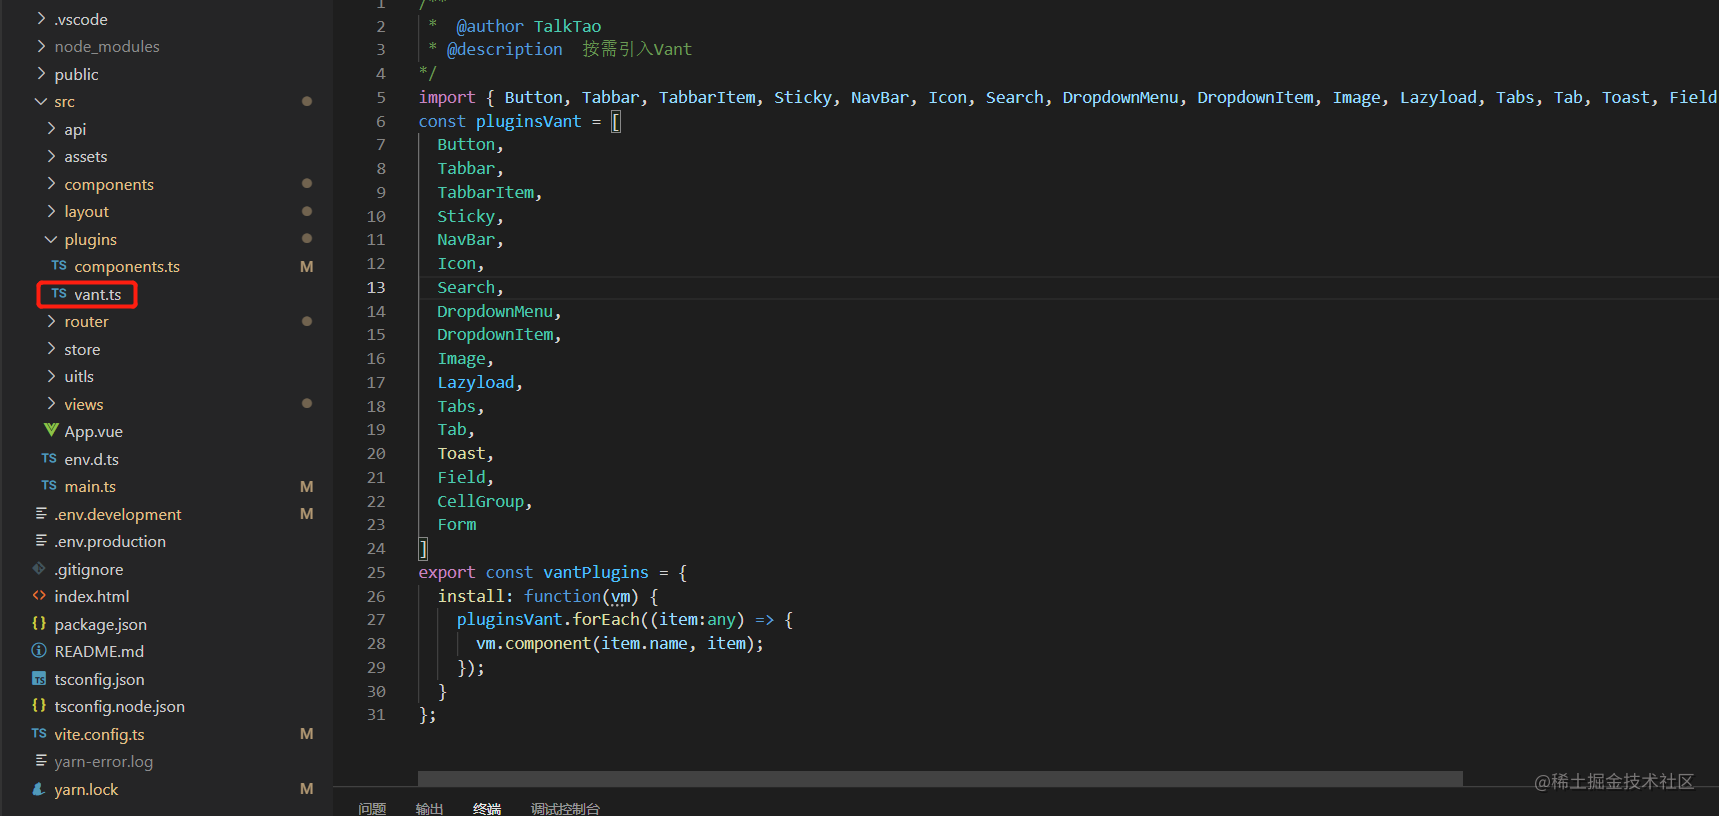
## VantUI组件按需加载
项目采 用[Vant 自动按需引入组件 (推荐)](https://link.juejin.cn?target=https%3A%2F%2Fyouzan.github.io%2Fvant%2F%23%2Fzh-CN%2Fquickstart%23fang-shi-yi.-zi-dong-an-xu-yin-ru-zu-jian-tui-jian "https://youzan.github.io/vant/#/zh-CN/quickstart#fang-shi-yi.-zi-dong-an-xu-yin-ru-zu-jian-tui-jian")下 面安装插件介绍:
#### 安装插件
```
yarn add vite-plugin-style-import -D
复制代码
```
在 `vite.config.ts` 设置
```
import vue from '@vitejs/plugin-vue';
import styleImport, { VantResolve } from 'vite-plugin-style-import';
export default {
plugins: [
vue(),
styleImport({
resolves: [VantResolve()],
}),
],
};
```
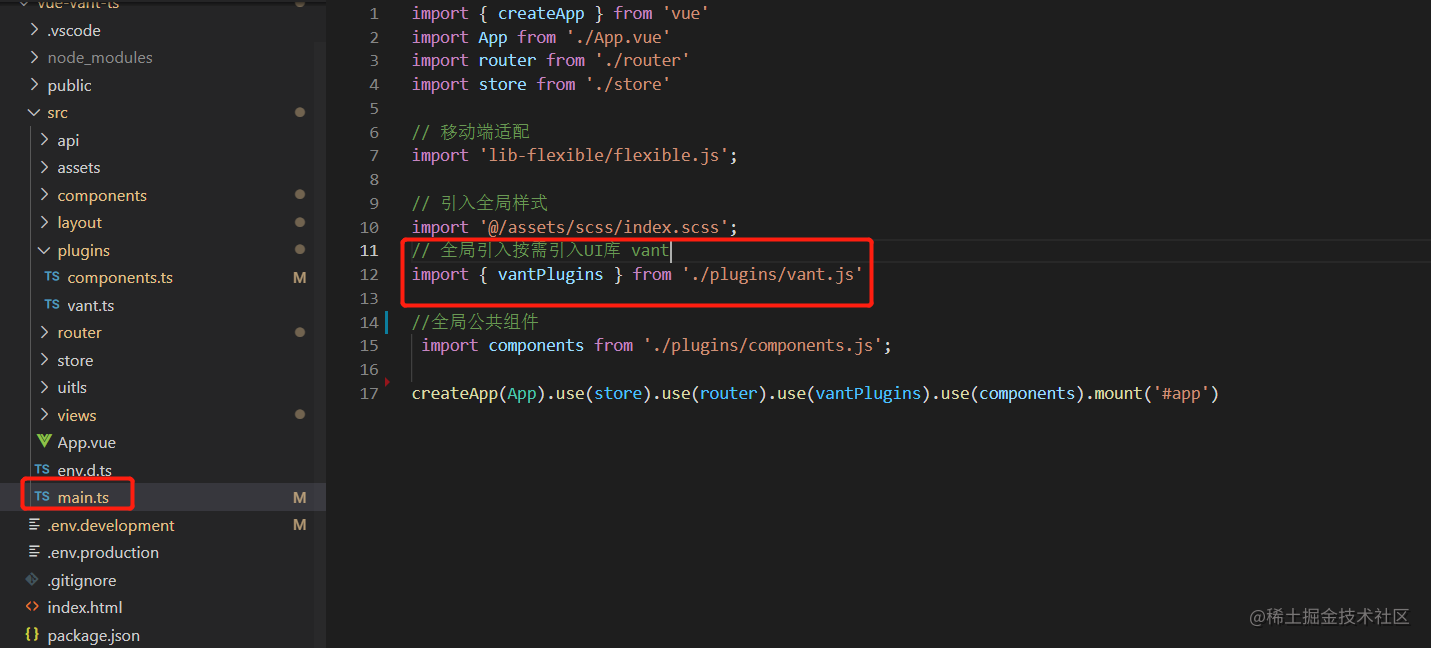
但是每次页面使用的时候还是要引入,很麻烦,项目在 `src/plugins/vant.ts` 下统一管理组件,无需在main.ts文件中多次use()
## Sass 全局样式
首先 你可能会遇到 `node-sass` 安装不成功,别放弃多试几次!!!
每个页面自己对应的样式都写在自己的 .vue 文件之中 `scoped` 它顾名思义给 css 加了一个域的概念。
```
复制代码
```
#### 目录结构
vue-h5-template 所有全局样式都在 `@/src/assets/css` 目录下设置
```
├── assets
│ ├── scss
│ │ ├── index.scss # 全局通用样式
│ │ ├── mixin.scss # 全局mixin
│ │ └── reset.scss # 清除标签默认样式
│ │ └── variables.scss # 全局变量
复制代码
```
#### 父组件改变子组件样式 深度选择器
当你子组件使用了 `scoped` 但在父组件又想修改子组件的样式可以 通过 `>>>` 来实现:
```
复制代码
```
#### 全局变量
```
// 引入全局样式
import '@/assets/css/index.scss'
```
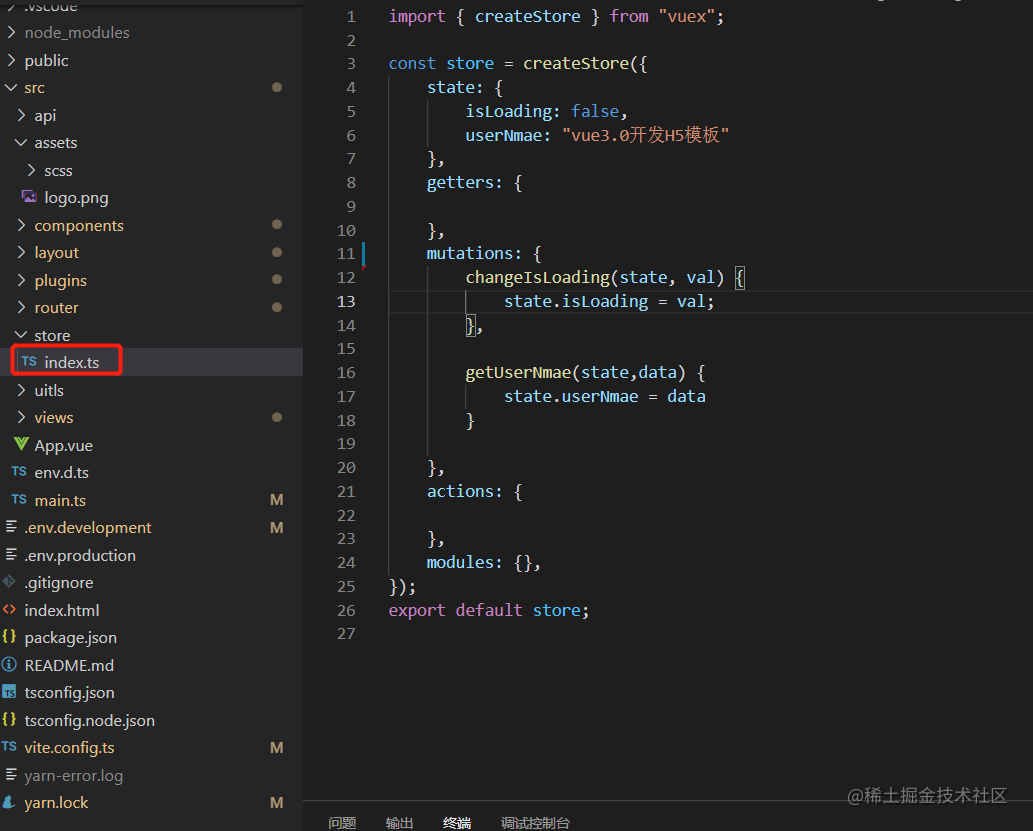
## Vuex 状态管理
目录结构
```
├── store
│ ├── index.ts
复制代码
```
`main.ts` 引入
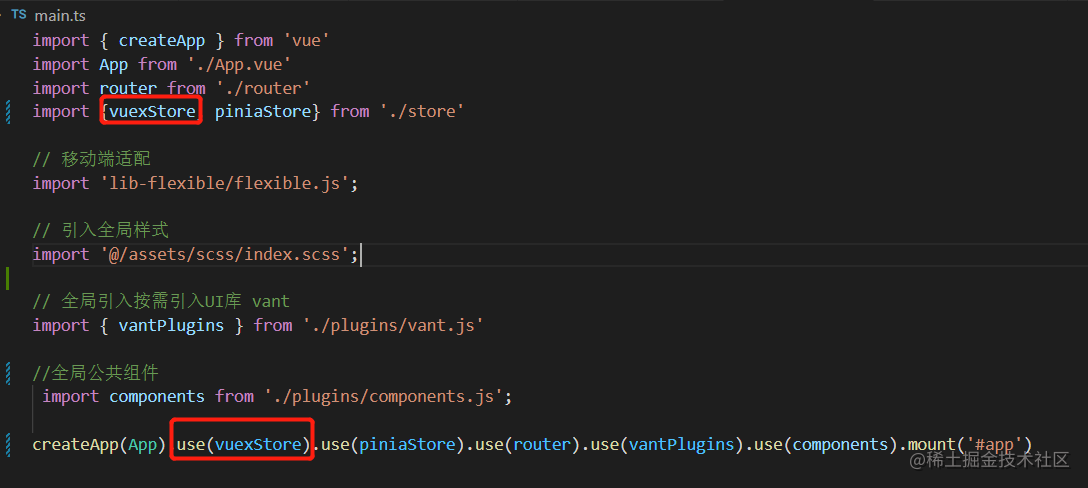
使用
## Pinia 状态管理
### 1.安装
`node版本需>=14.0.0`
```js
yarn add pinia
# or with npm
npm install pinia
```
### 2. 创建Pinia的Store
在`src/store/index.ts` 文件中,导出 piniaStore
```js
// src/store/index.ts
import { createPinia } from 'pinia'
export const piniaStore = createPinia()
```
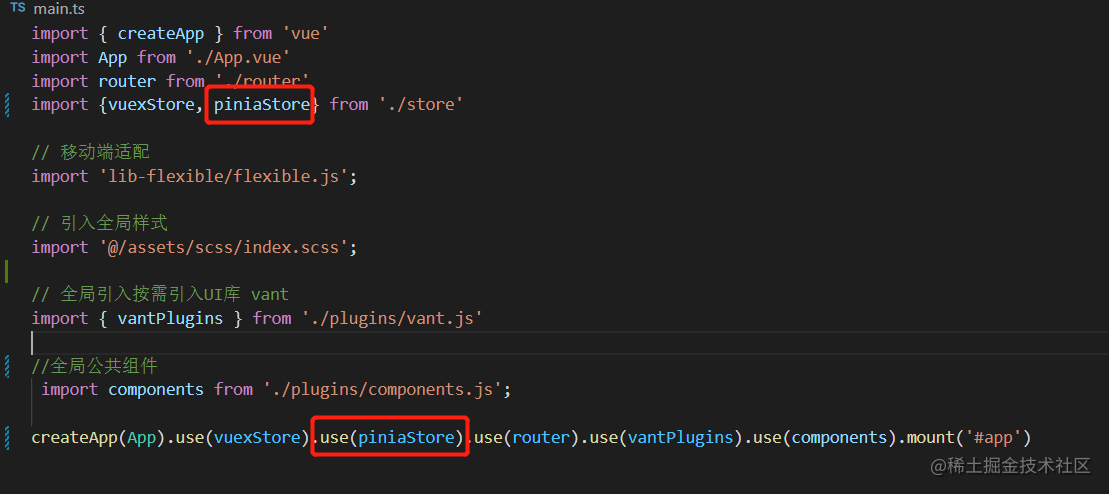
### 3.在main.ts文件中引用
### 3. 定义State
在`src/store`目录下新建有个`testPinia.ts`文件
#### i. 传统的`options API`方式
```js
import { defineStore } from "pinia"
export const usePiniaState = defineStore({
id: 'textPinia',
state: () => {
return {
userName: ''
}
},
getters: {
},
actions: {
getUserNmae(data) {
this.userName = data
}
}
})
```
#### ii.Vue3 `setup`的编程模式
```js
import { ref } from 'vue'
import { defineStore } from "pinia"
export const usePiniaState = defineStore('pinia', ()=>{
const userName = ref('')
// 修改userName的方法
const getUserNmae = (data) => {
userName.value = data
}
return { userName, getUserNmae}
})
```
### 4.获取/修改 state
```js
```
## Vue-router
本案例采用 `hash` 模式,开发者根据需求修改 `mode` `base`
#### 自动化导入路由
```js
import { createRouter, createWebHashHistory, RouteRecordRaw } from "vue-router";
// 通过Vite的import.meta.glob()方法实现自动化导入路由
const mainRouterModules = import.meta.glob('../layout/*.vue')
const viewRouterModules = import.meta.glob('../views/**/*.vue')
// 子路由
const childRoutes = Object.keys(viewRouterModules).map((path)=>{
const childName = path.match(/\.\.\/views\/(.*)\.vue$/)[1].split('/')[1];
return {
path: `/${childName.toLowerCase()}`,
name: childName,
component: viewRouterModules[path]
}
})
console.log(childRoutes,'childRouter');
// 根路由
const rootRoutes = Object.keys(mainRouterModules).map((path) => {
const name = path.match(/\.\.\/layout\/(.*)\.vue$/)[1].toLowerCase();
const routePath = `/${name}`;
if (routePath === '/index') {
return {
path: '/',
name,
redirect: '/home',
component: mainRouterModules[path],
children: childRoutes
};
}
})
const routes: Array = rootRoutes
const router = createRouter({
history: createWebHashHistory(),
routes,
});
export default router
```
#### 普通设置
```js
import { createRouter, createWebHashHistory, RouteRecordRaw } from "vue-router";
const routes: Array = [
{
path: '/',
name: 'Index',
component: () => import ('@/layout/index.vue'),
redirect: '/home',
meta: {
title: '首页',
keepAlive:false
},
children: [
{
path: '/home',
name: 'Home',
component: () => import('@/views/home/Home.vue')
},
{
path: '/about',
name: 'About',
component: () => import('@/views/about/About.vue')
},
]
},
]
const router = createRouter({
history: createWebHashHistory(),
routes,
});
export default router
```
更多:[Vue Router](https://link.juejin.cn?target=https%3A%2F%2Frouter.vuejs.org%2Fzh%2F "https://router.vuejs.org/zh/")
## Axios 封装及接口管理
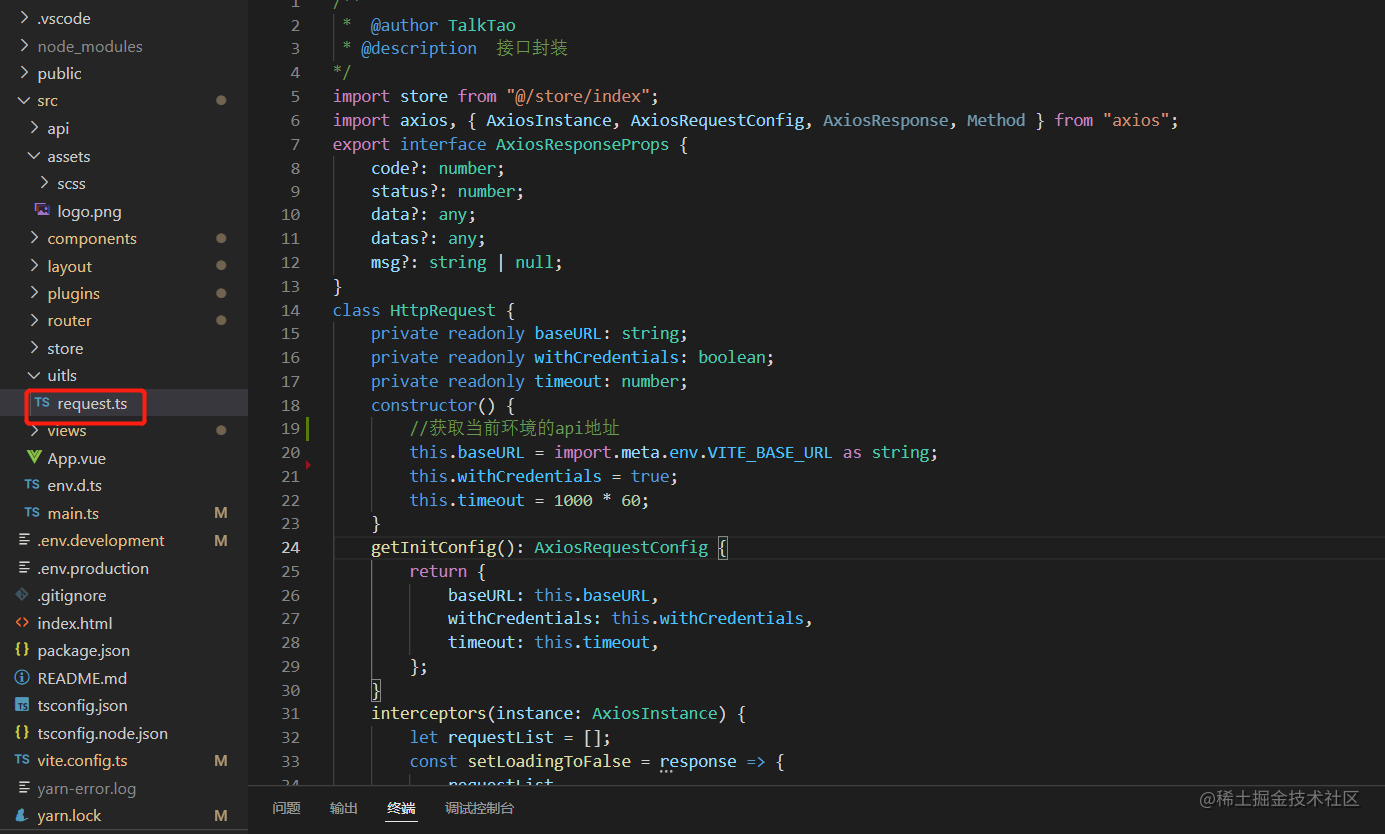
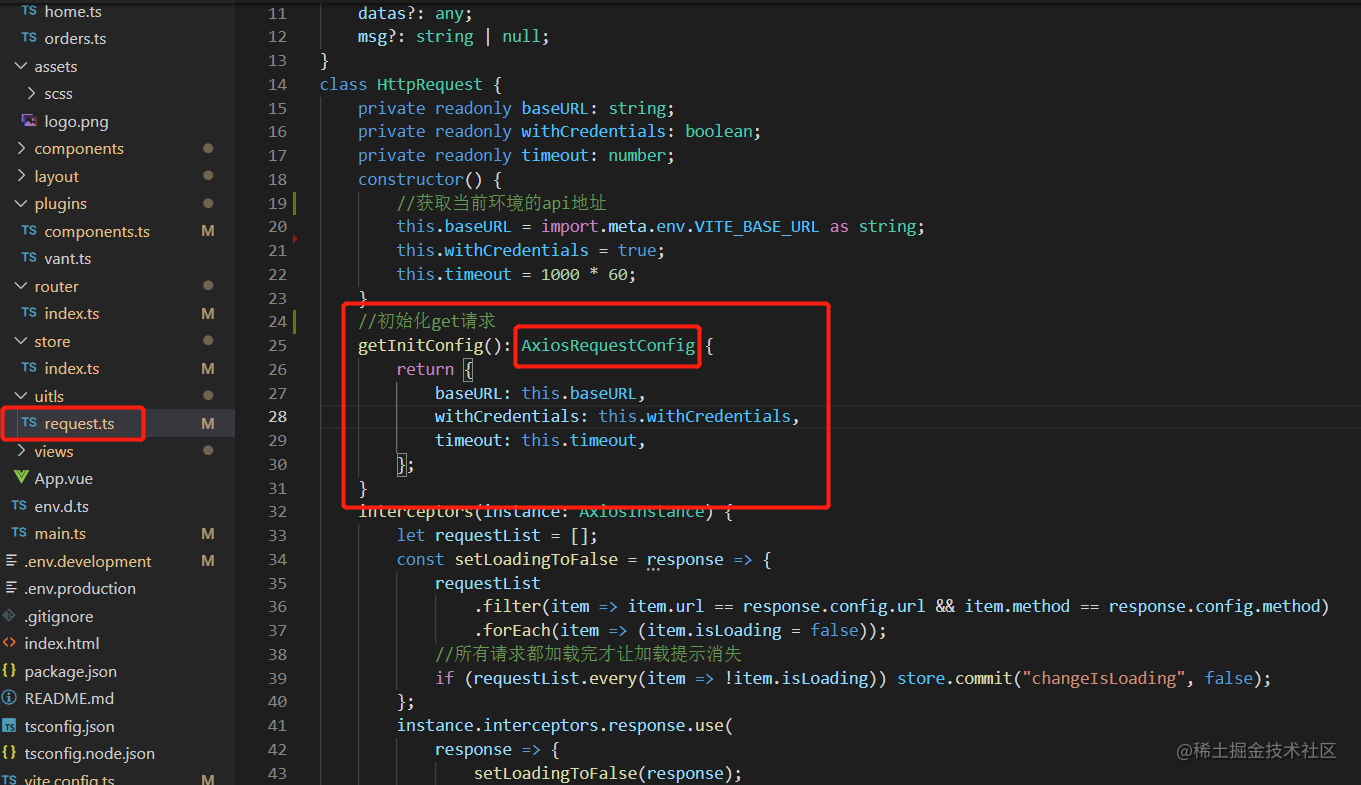
`utils/request.js` 封装 axios ,开发者需要根据后台接口做修改。
#### 接口管理
在`src/api` 文件夹下统一管理接口
通过引入axios库的ts版本即可配置
```js
import axiosInstance, { AxiosResponseProps } from '@/uitls/request'
export const getList = (params: any) => {
return axiosInstance.get("/common/code/logisticsInfo/getOrderByPhone", { params: params || {} });
}
```
#### 如何调用
```
// 请求接口
import { getUserInfo } from '@/api/home'
const params = {user: 'talktao'}
getUserInfo(params)
.then(() => {})
.catch(() => {})
复制代码
```
## vite.config.ts 基础配置
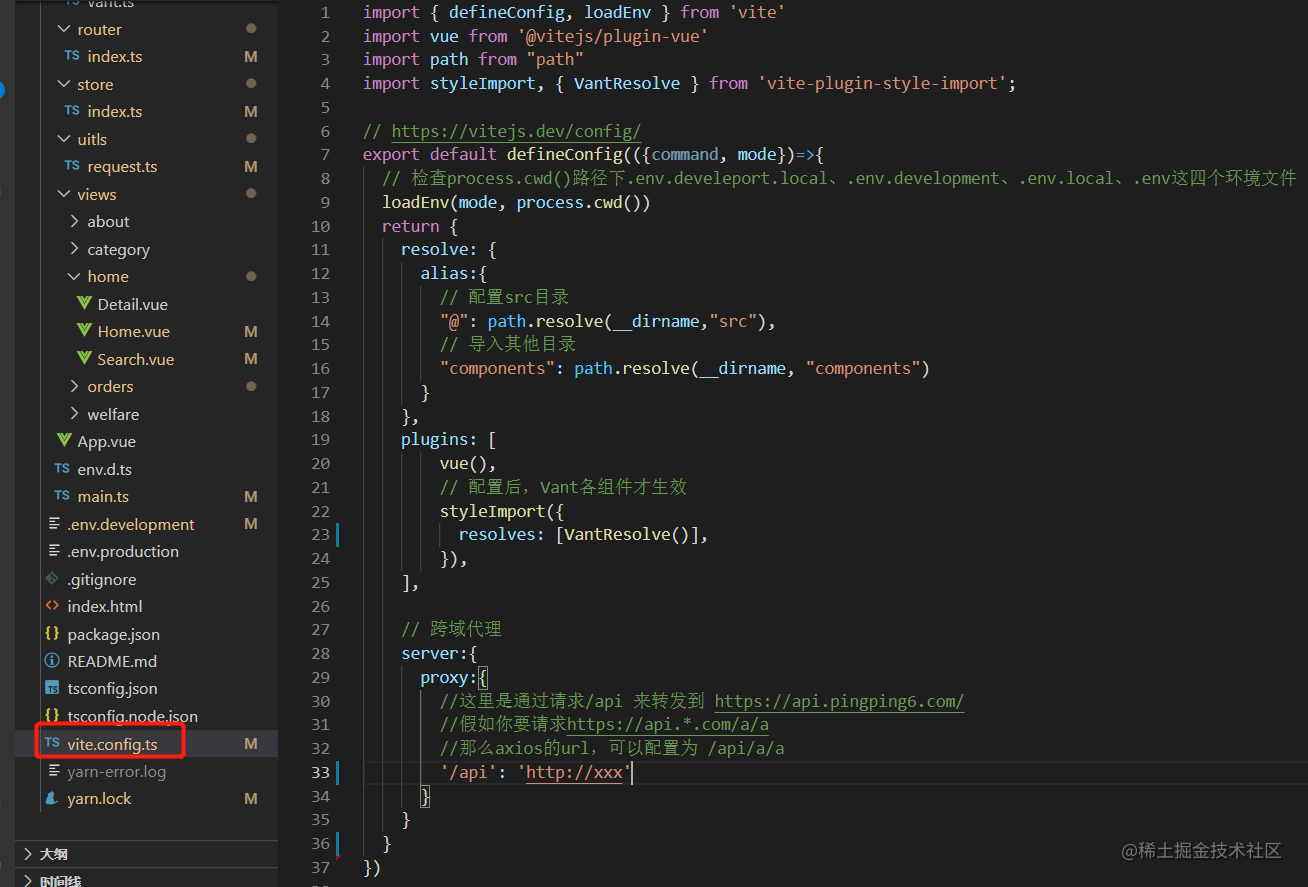
## 检查文件中的env路径
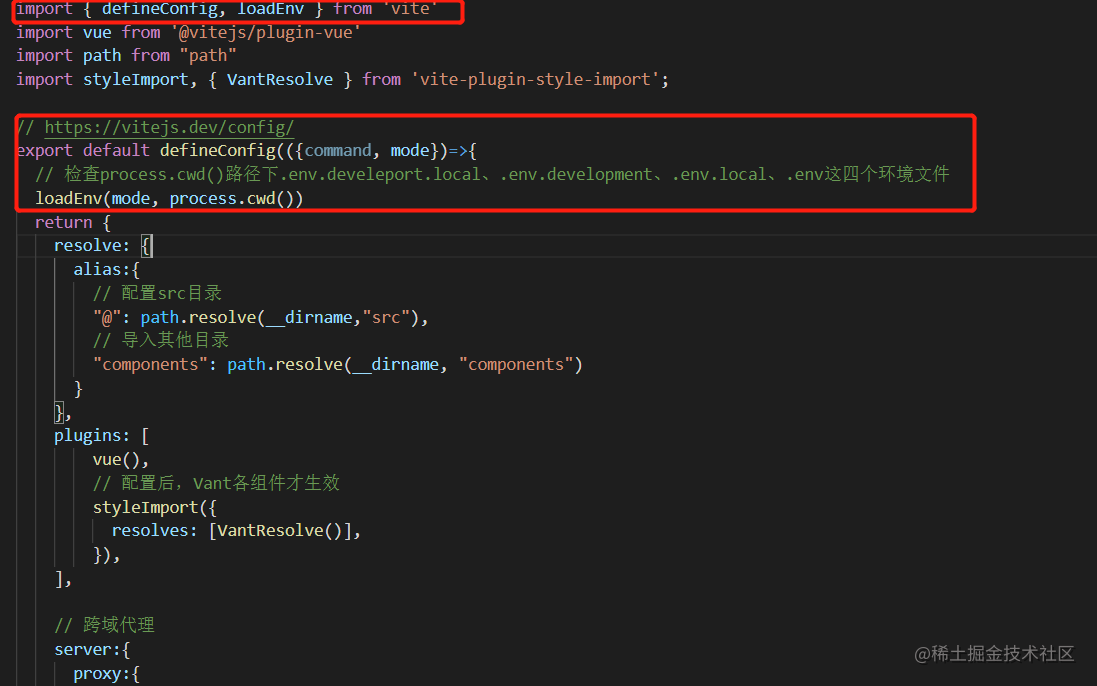
## 配置 alias 别名
```
resolve: {
alias:{
// 配置src目录
"@": path.resolve(__dirname,"src"),
// 导入其他目录
"components": path.resolve(__dirname, "components")
}
},
```
## 配置 proxy 跨域
如果你的项目需要跨域设置,你需要打开 `vite.config.ts` `proxy` 注释 并且配置相应参数
**注意**:你还需要将 `src/env.development` 里的 `VITE_BASE_URL ` 设置成 '/'
```
module.exports = {
// 跨域代理
server:{
proxy:{
//这里是通过请求/api 来转发到 https://api.pingping6.com/
//假如你要请求https://api.*.com/a/a
//那么axios的url,可以配置为 /api/a/a
'/api': ''
}
}
}
```
## Eslint+Pettier 统一开发规范
VScode安装 `eslint` `prettier` `vetur` 插件 `.vue` 文件使用 vetur 进行格式化,其他使用`prettier`
## 批量全局注册公共组件
文件地址在 `src/plugins/components`
```js
const modules = import.meta.globEager('../components/*.vue')
export default {
install(app) {
Object.keys(modules).forEach(componentPath => {
let splitPart1 = componentPath.split("/")
let componentName = splitPart1[splitPart1.length - 1].split(".vue")[0]
// 获取所有组件的实例对象,它是个数组
let modulesData = Object.values(modules).map((v) => v.default)
// 过滤出当前组件的实例对象与注册组件匹配一致
let curComponent = modulesData.filter(
item=>item.__file.split("/")[item.__file.split("/").length-1].split(".vue")[0] === componentName
)[0]
app.component(componentName, curComponent);
})
}
}
```
上面的批量全局注册公共组件在本地启动中正常,但是上生产打包后,会有问题,具体是__file该组件路径找不到,可以修改成如下代码:
``` js
const modules = import.meta.globEager('../components/*.vue')
export default {
install(app) {
Object.keys(modules).forEach(componentPath => {
// 获取遍历的当前组件实例对象
let curComponent = modules[componentPath]?.default
app.component(curComponent.name, curComponent);
})
}
}
```
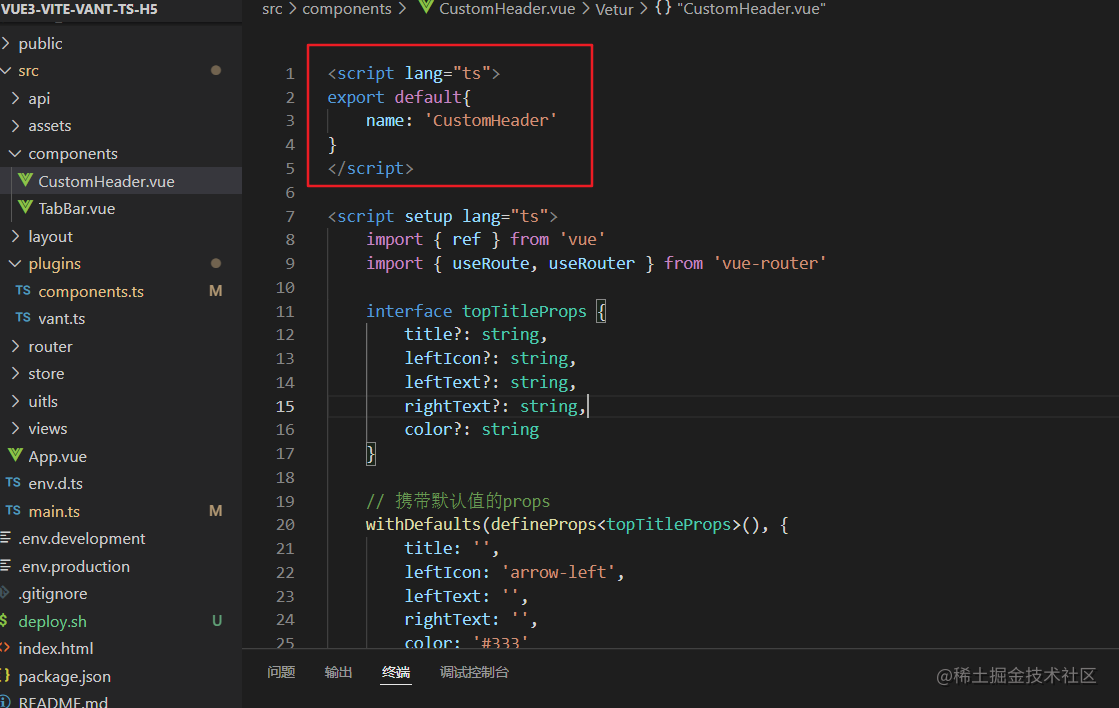
### 注意:
由于sfc语法糖没有携带组件的name属性,上面的curComponent.name会报curComponent下没有name属性,此时需要在注册的公共组件中加上如下代码,比如在src/components/CustomHeader.vue中加上如下代码,这样组件的实例对象中就会有name属性
## 关于我
如果对你有帮助送我一颗小星星(づ ̄3 ̄)づ╭❤~
转载请联系作者!